Trace: • How to filter attachments • Spamrules example - increase spam score for long sender domain • How To Upgrade VPOP3 to version 5 or later • Formatting Syntax • How do I get support? • Initial Configuration Tasks • Misc -> External Fax Tab • VPOP3 2.x crashes when user tries to download mail • UserRuleList Replacement • Setup steps for multiple POP3 accounts at the ISP
Sidebar
how_to:setup_steps_for_multiple_pop3_accounts_at_the_isp
Setup steps for multiple POP3 accounts at the ISP
- Set up all the local users you need in the 'Users' page in the VPOP3 settings. The usernames & passwords do not have to have any relation to the ISP's accounts. These are the details which the users will put in their email clients (eg Outlook) to collect their mail from VPOP3.
- Check that there is a Connection method defined under the 'Connections' entry at the left. This tells VPOP3 how to connect to the Internet. If there isn't one, click on 'Add New' under the Connections entry to create one. (If you have run through the initial setup wizard, that will have created one for you).
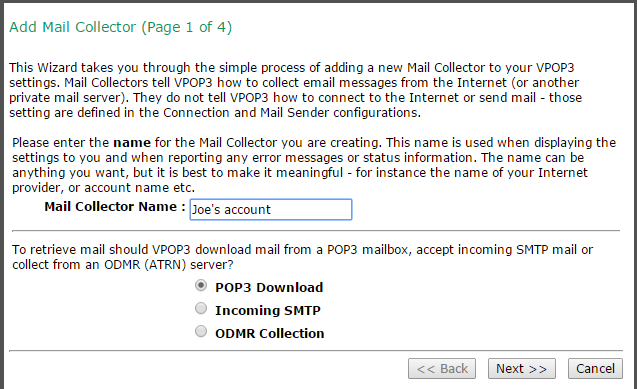
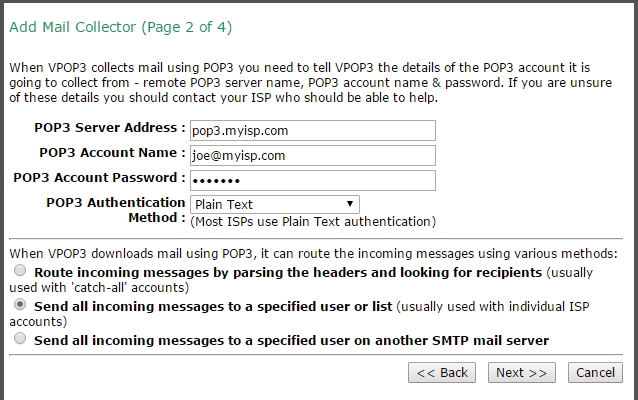
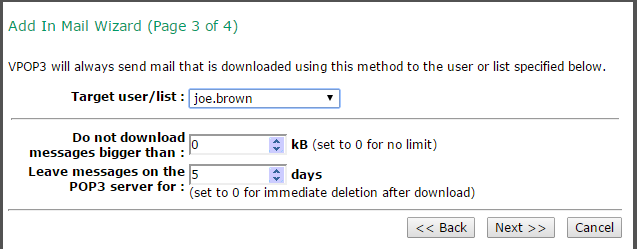
- Under the 'Mail Collector' item on the left of the screen, click 'Add New'
- Press Finish
- Repeat Step 4a-4d for all the ISP POP3 accounts
- Still in the Mail Connectors page, click on Connector Schedule, and ensure there is a connection schedule defined for VPOP3 to collect mail from the ISP accounts. (If you have run through the initial setup wizard, that will have created an initial schedule for you).
All the settings you make you can change later if you wish,
how_to/setup_steps_for_multiple_pop3_accounts_at_the_isp.txt · Last modified: 2018/11/14 10:45 by 127.0.0.1


