Sidebar
how_to:calendar_in_mozilla_lightning
This is an old revision of the document!
Calendars in Mozilla Lightning
Lightning is a free calendar plugin for the free Thunderbird email client.
To add a VPOP3 CalDAV calendar to Mozilla Lightning is straightforward
- Install the Lightning plugin for Thunderbird if you have not already done so
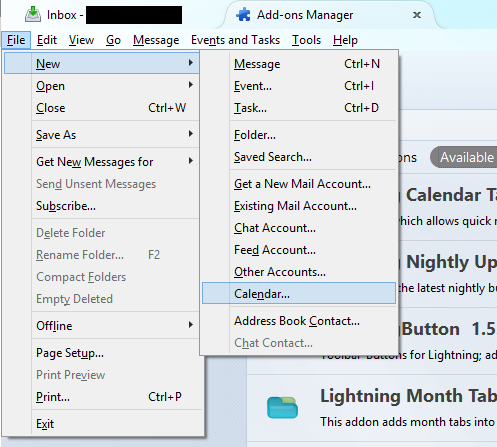
- In Thunderbird, go to Tools → Add-ons
- Click Get Add-ons
- In the search box at the top-right, enter Lightning and search.
- Select the Lightning plugin and press the Install button
- Restart Thunderbird when prompted
- Add the calendar to Thunderbird
- In Thunderbird, go to File → New → Calendar
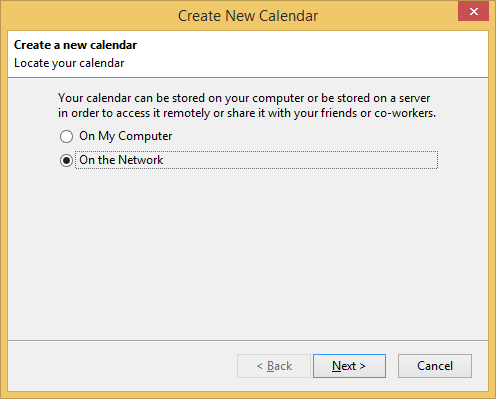
- Select On the Network, press Next
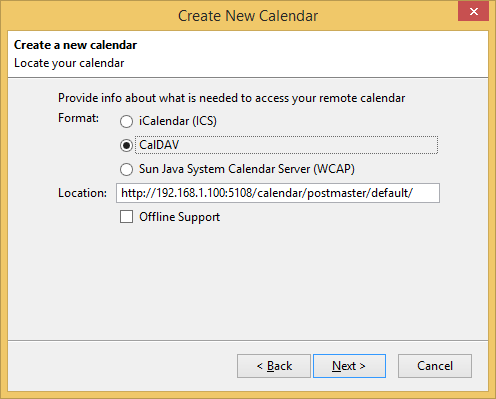
- Select CalDAV, in the Location box enter the URL for the calendar. For the user's default calendar, this will be http://<server address>:5108/calendar/<username>/default, eg http://192.168.1.100:5108/calendar/postmaster/default/. Press Next
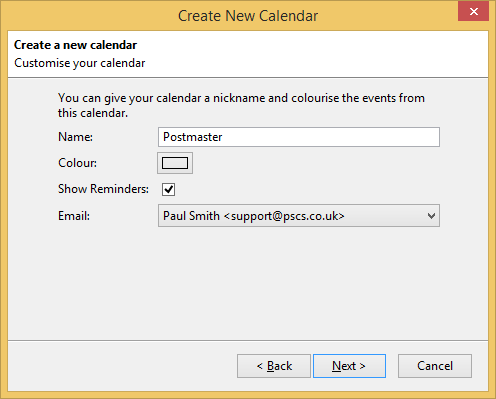
- Enter a name (for your reference), colours, etc for the new calendar, and press Next
- Press Finish
- Now the calendar should appear if you go to Events and Tasks → Calendar. If you have multiple calendars defined in Lightning, then you can select which ones are displayed using the list on the left of the page


how_to/calendar_in_mozilla_lightning.1402394564.txt.gz · Last modified: (external edit)