Sidebar
how_to:mozilla_thunderbird
Table of Contents
How to configure Mozilla Thunderbird
This article won't show you all the possible settings in Thunderbird, because there are so many. Thunderbird is one of the most powerful & flexible email clients available at the time of writing, especially if you use IMAP4 (with VPOP3 Enterprise).
The instructions below are for Thunderbird version 3.0, but the settings should be similar in later versions. Earlier versions just have a manual setup procedure, so you can skip some of the steps below.
Note that the below settings are only suggestions, and there are many other ways you may want to set things up, but these are a good starting point.
Email account
- To set up an email account in Thunderbird go to Tools → Account Settings

- From the Account Actions drop-down, choose Add Mail Account
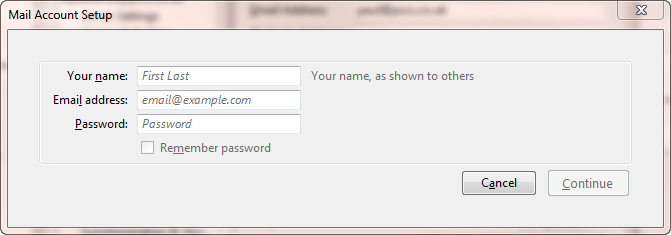
- Enter your name, email address and VPOP3 password into the relevant boxes, and check the Remember Password box
- Press Continue
- Thunderbird will now try to locate your mail servers automatically. This will rarely work successfully if you have your own mail server, so press Stop
- Note that Thunderbird will continue trying to find your mail servers. The actual result will depend on many factors, so we can't give definitive steps here. For instance, in our case, we do have a mailserver called 'mail.pscs.co.uk', but that isn't the one we want to use, so, although it says it “found the settings” it found incorrect ones!
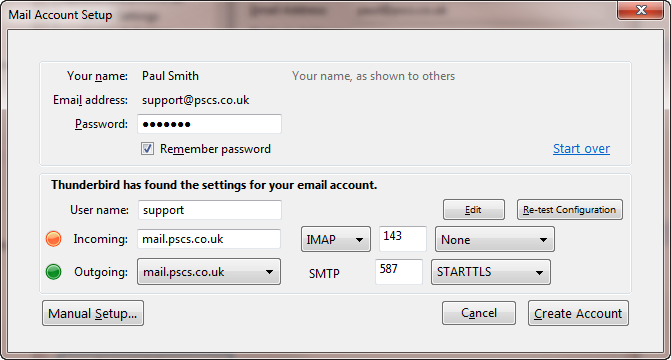
- On the 'Incoming' row, choose the relevant method - POP3 or IMAP4. If you have VPOP3 Basic, then you must use POP3. If you have VPOP3 Enterprise, you can use either method, but we recommend you use IMAP4.
- Press Manual Setup…
- Back in the main Thunderbird Accounts Settings page, choose Server Settings for the account you just added

- In Server Name, put the IP address of the VPOP3 computer. In Port, put the relevant port for the type of server you are running, and the service settings defined in VPOP3 for that service (usually 110 for POP3 or 143 for IMAP4)
- Choose Outgoing Server (SMTP) from the list on the left
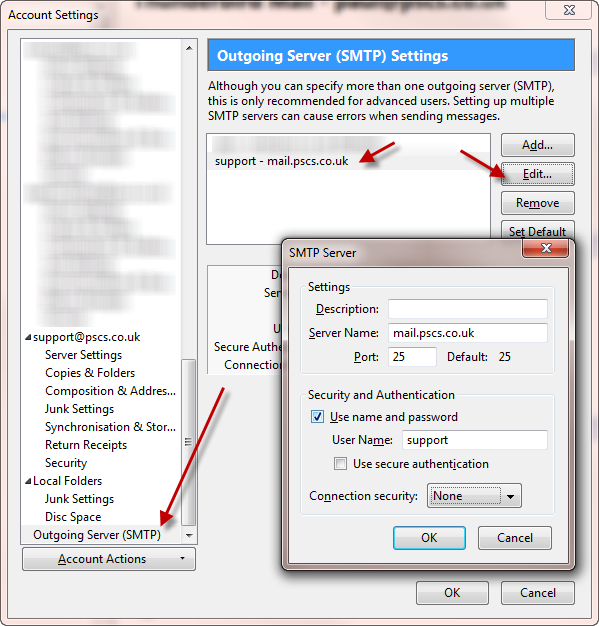
- Select the new outgoing server you have created, and press Edit
- In the Server Name box put the IP address of the VPOP3 computer. In Port put the port number for the VPOP3 SMTP service (usually 25).
- Normally, but not always, you will want to check Use name and password and enter your VPOP3 username. (Whether you will need this depends on the VPOP3 settings).


Directory Account
If you want Thunderbird to be able to access the VPOP3 LDAP service:
- Go to Tools → Options in Thunderbird
- Go to the Composition page, then the Addressing tab
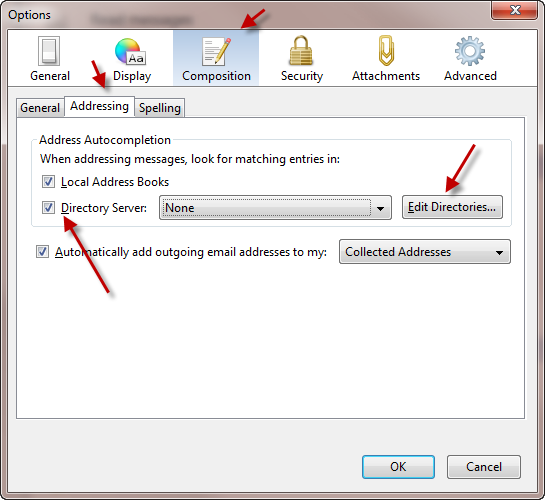
- Check the Directory Server box, then press Edit Directories
- Press Add
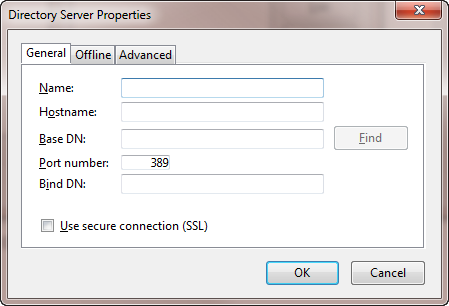
- In Name, put something like 'VPOP3' or 'Company Address Book' etc
- In Hostname put the IP address of the VPOP3 computer
- In Port number put the port where the VPOP3 service is running (usually 389)
- You can leave the other settings at their defaults
- Press OK, OK
- In the box next to the Directory Server checkbox in the main Options page, you may want to select the new directory service you have created, but this is optional.


how_to/mozilla_thunderbird.txt · Last modified: by 127.0.0.1